Growing spinach indoors is an enjoyable, rewarding activity that lets you savor fresh greens year-round. Whether you’re a seasoned gardener looking to bring your skills inside or a total beginner eager to start, spinach is the perfect crop to try.
It grows quickly, requires minimal space, and is surprisingly easy to care for. In this detailed guide, you’ll learn everything from choosing the right spinach varieties to harvesting your tasty crop.
We’ll explore both traditional soil and modern hydroponic methods, so you can choose the best fit for your space and lifestyle.
Let’s turn your indoor space into a vibrant spinach garden!

Why Grow Spinach Indoors?
Indoor spinach gardening offers many benefits.
First, it provides fresh, nutrient-rich spinach anytime, without worrying about outdoor weather or seasonal changes. Growing spinach indoors saves space, making it perfect for apartments, dorms, or small homes.
It also greatly reduces common garden pests and diseases, ensuring a healthier, cleaner harvest. Best of all, spinach grows quickly, usually ready to eat in just 4 to 6 weeks!
Choosing the Best Spinach Varieties 🥬
Selecting the right spinach variety is important for a successful indoor garden. Here are some popular, reliable options:
- Bloomsdale Long Standing: Known for crinkly leaves packed with nutrients, this variety resists early flowering (bolting) and grows very well indoors.
- Space Spinach: Compact and fast-growing, ideal for small containers, it produces tender, flavorful leaves quickly.
- Baby Leaf Spinach: Specifically grown to be harvested young, these tender leaves are perfect for salads and sandwiches.
- Giant Winter: Cold-resistant and robust, it’s perfect for cooler indoor conditions.
- Perpetual Spinach: Actually a type of chard, this spinach produces leaves continuously, resisting bolting effectively.
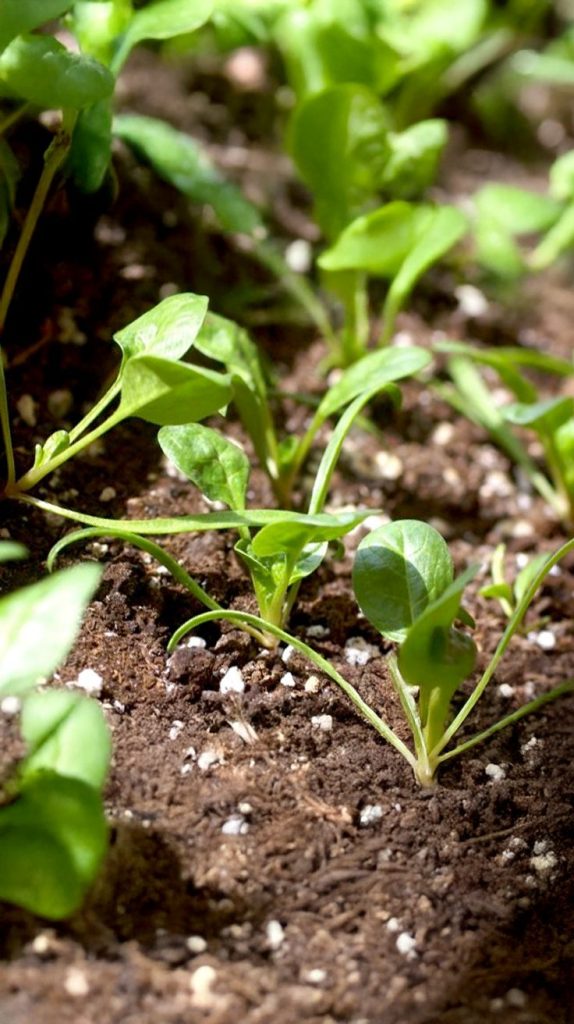
Growing Spinach Indoors Using Soil
Growing spinach in soil is a simple and straightforward method, perfect for beginners.
Getting Started:
You’ll need containers with good drainage, quality potting soil, spinach seeds, a watering can or spray bottle, and either natural sunlight or grow lights.
Step-by-Step Instructions:
First, select containers at least 6–8 inches deep with drainage holes. Fill these with quality potting soil, leaving about an inch of space from the rim. Next, plant spinach seeds about ½ inch deep, spaced roughly 2–3 inches apart.
Water the seeds gently, ensuring the soil remains consistently moist without becoming waterlogged. Spinach seeds usually germinate within 7–14 days. Once seedlings emerge, thin them out if they appear crowded to allow healthier growth.
Ensure your spinach receives about 4–6 hours of natural sunlight daily or supplement with grow lights for 10–12 hours. Regularly rotate your containers to ensure even growth, and apply a balanced liquid fertilizer every few weeks to keep your spinach nourished.

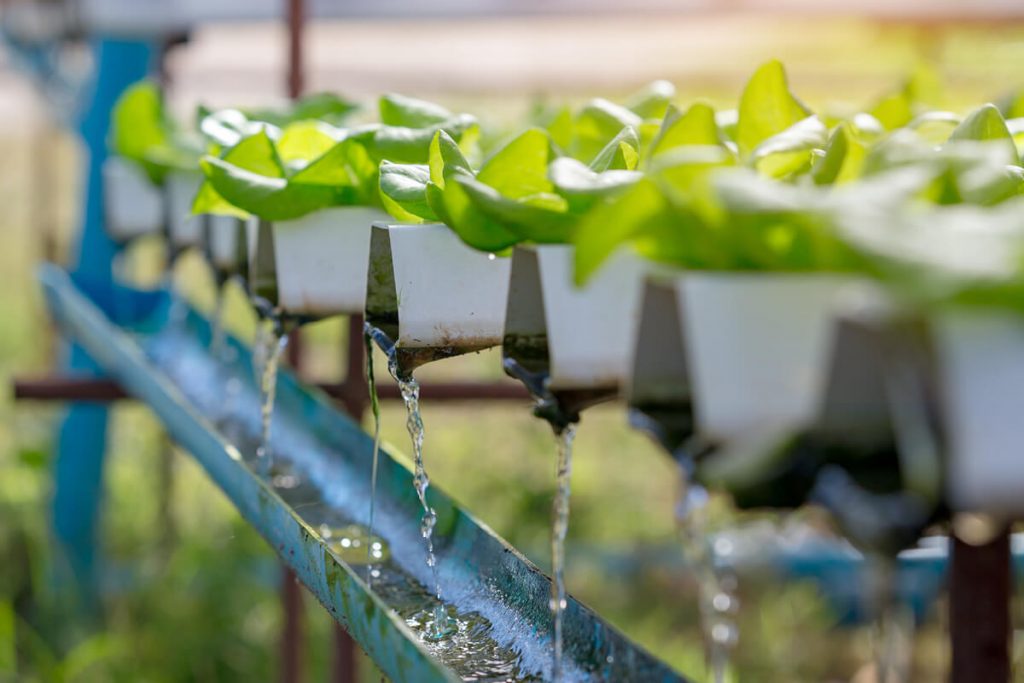
Growing Spinach Indoors Using Hydroponics 💧
Hydroponics involves growing plants without soil, using nutrient-rich water instead. This method is ideal if you prefer cleaner, faster-growing crops.
Getting Started:
For hydroponic spinach, you’ll need a simple hydroponic system (like Deep Water Culture or the Kratky method), rockwool cubes or coco coir plugs, hydroponic nutrient solution, spinach seeds, and grow lights.
Step-by-Step Instructions:
First, set up your hydroponic system following the instructions. Fill your system with water mixed with the recommended amount of hydroponic nutrients, aiming for a pH around 6.0.
Soak spinach seeds in room-temperature water for 4–8 hours before planting to speed up germination. Then plant the seeds into moist rockwool cubes or coco coir plugs. When seedlings sprout and develop true leaves, gently transfer them to your hydroponic system.
Maintain the nutrient solution levels, topping up regularly and fully replacing it every 1–2 weeks. Provide 10–12 hours of artificial lighting daily to encourage healthy, vigorous growth. Regularly monitor your plants, adjusting nutrient levels and checking for signs of algae or other issues.
How to Grow Spinach in Containers 🌱
So your spinach seeds have sprouted—congrats! Now comes the fun part: helping your plants grow into lush, tasty leaves. Here are three simple tips to ensure a bumper crop of delicious spinach from your container garden:
1. Watering is Key 💦
Spinach loves consistent moisture—think slightly damp, never soggy. Container-grown spinach tends to dry out faster than spinach planted directly in the ground, so you’ll want to check your pots daily. If the soil surface feels dry, it’s time for a nice, deep watering. A watering can or a garden hose with a gentle spray attachment makes this easy.
Why so much attention on watering? Well, spinach plants stressed by drought tend to “bolt,” meaning they quickly shift from leafy growth to producing flowers and seeds. Once this happens, spinach leaves become bitter and less tasty. At this point, it’s best to pull the plants out and toss them onto your compost pile. Keeping spinach well-watered—and adding a mulch layer such as straw—helps prevent bolting, so you can enjoy fresh greens longer.
Quick watering tip: After sowing seeds, water deeply to encourage strong germination. Then, maintain consistently moist soil as your spinach grows, never letting the pots completely dry out.
2. Give Your Spinach Plenty of Sun 🌞
Spinach grows best with about 6 to 8 hours of direct sunlight daily. If your space is partially shaded, spinach will still grow—but more slowly, usually thriving with just 3 to 4 hours of sunlight.
Interestingly, a bit of afternoon shade can actually help during warmer months. Shade reduces stress from the hot midday sun, delaying bolting and extending your harvest window by a couple of weeks. If you’re planting in late spring or summer, strategically place your pots to give your spinach some afternoon relief.
3. Succession Plant for a Continuous Harvest 🌿
One great trick for a steady supply of spinach is called “succession planting.” Once your first spinach seedlings are a few inches tall, plant another container with fresh seeds. By the time you’ve harvested all the leaves from your first pot, your second pot will be ready to start picking. Repeat this process, and you’ll have an ongoing rotation of fresh spinach leaves ready to enjoy.
When and How to Harvest Your Spinach 🥗
Spinach is a speedy grower—baby spinach leaves are ready for picking just about 30 days after sowing. Mature leaves typically take between 38 and 50 days, depending on the variety.
Harvesting is straightforward. For continuous picking, gently remove the outer, larger leaves first. Allow the inner leaves to keep growing. Baby spinach is best harvested when the leaves reach about 2 to 4 inches in length, while mature leaves are tastiest between 4 and 10 inches. You’ll know it’s time to fully harvest the plant when you notice the plant growing taller and producing a flower stalk in the center—this means your spinach is beginning to bolt.
Once harvested, spinach leaves taste best fresh. But if you need to store them, give the leaves a gentle wash, pat dry, and keep them refrigerated in a plastic bag. They’ll stay fresh for a few days—perfect for salads, smoothies, or a quick sauté.
Essential Indoor Spinach Growing Tips 🌞💧
Ensuring your spinach thrives indoors is straightforward with a few simple guidelines. Lighting is critical, so position your plants to get consistent, adequate illumination. Indoor spinach loves temperatures between 60–70°F (15–21°C); avoid higher temperatures that can cause early flowering.
Proper watering is essential—soil-grown spinach should be kept moist but not soggy, while hydroponically grown spinach requires clean, oxygenated water. Regularly check and adjust water and nutrient levels to maintain optimal plant health.

Troubleshooting Common Issues 🚨
Bolting (Early Flowering)
High temperatures or excessively long daylight periods often trigger bolting. Keep temperatures moderate, limit artificial lighting to about 12 hours daily, and choose bolt-resistant varieties.
Yellow Leaves
Yellowing leaves usually indicate nutrient deficiencies or watering problems. Adjust your fertilizing schedule and ensure consistent watering practices.
Indoor Pests
Though rare, indoor spinach might face issues with pests like aphids, fungus gnats, or spider mites. Combat these with mild soapy water sprays and improved airflow, and allow the soil surface to dry slightly between waterings.
Harvesting Your Spinach 🥗
Spinach typically matures and is ready to harvest in 4–6 weeks. Harvest baby spinach leaves when they are young, tender, and around 3–4 inches long.
For larger leaves, allow them to grow slightly bigger. Use clean scissors or your fingers to gently remove the outer leaves first, leaving the center intact to continue growing. This method, known as “cut-and-come-again,” provides multiple harvests from a single plant.

Enjoying Your Indoor Spinach Harvest 🎉
There’s nothing quite like enjoying fresh spinach grown right in your own home. Use your spinach in salads, smoothies, sandwiches, or lightly sautéed as a nutritious side dish. The satisfaction and taste of homegrown produce make the entire experience truly rewarding.
With this detailed guide, you’re now ready to grow delicious, healthy spinach indoors, transforming your living space into a lush, green garden!
Happy gardening! 🌿😊