Hydrangeas are old-fashioned garden plants that seem to be undergoing a revival. Many experienced gardeners are rediscovering these gems while many younger gardeners are learning how hydrangeas can provide some glorious color to their gardens.
However, while hydrangeas are fairly easy to grow and relatively undemanding in the garden, they do sometimes experience problems. More often than not, these problems can be diagnosed by looking at the large leaves on these plants.
I found issues easier to diagnose with pictures, so here are the 7 pictures of hydrangea leaf problems that you might encounter.
1. Cercospora Leaf Spot
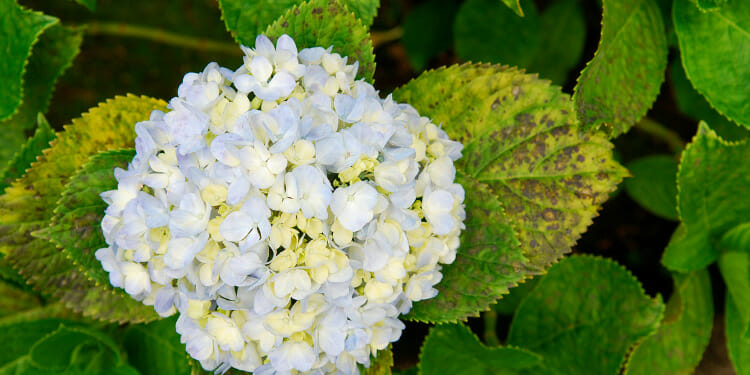
Hydrangea leaves can succumb to a couple of different types of fungal leaf spots. Usually these display as brown or purple spots with darker centers and sometimes, lighter halos around the spots themselves.
There are two types of common fungal infections on hydrangeas. Cercospora leaf spot usually exhibits as purple or brown spots that sometimes have gray or tan centers. Quite often these are surrounded by purple or brown halos. When the leaves become heavily infected, they will often turn yellow and eventually fall off the plant.
2. Anthracnose Fungal Leaf Spot
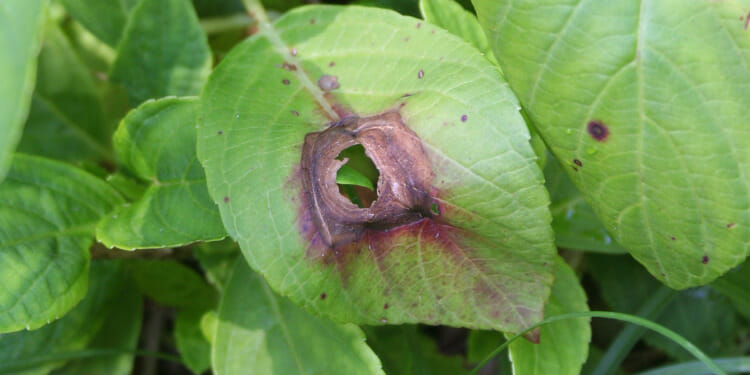
Anthracnose is another common fungal infection and exhibits as quite large spots that are brown in color and have tan or light brown centers. If you also notice some spots on the flowers, you can be certain that the plant has an anthracnose infection.
Thankfully, these fungal diseases are of no major concern to the health of the plant except that they may look a little unsightly. You will find that these fungal leaf spots will usually appear toward the end of the season when the leaves are ready to drop off the plant anyway.
Once spring comes around, the new growth will be lovely and green.
However, there are ways that you can minimize fungal infections on your hydrangeas. You can cut off the infected leaves if there are just a few in order to stop the fungus from spreading.
It’s also important to remove any debris from beneath the plant and throw it in the garbage. You should also cut off any spent blooms so that they don’t end up sitting on the leaves which can limit air circulation around the plant.
3. Frost Or Cold Damage
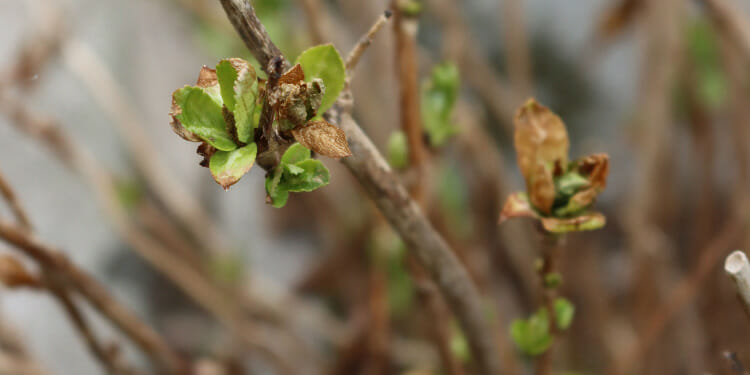
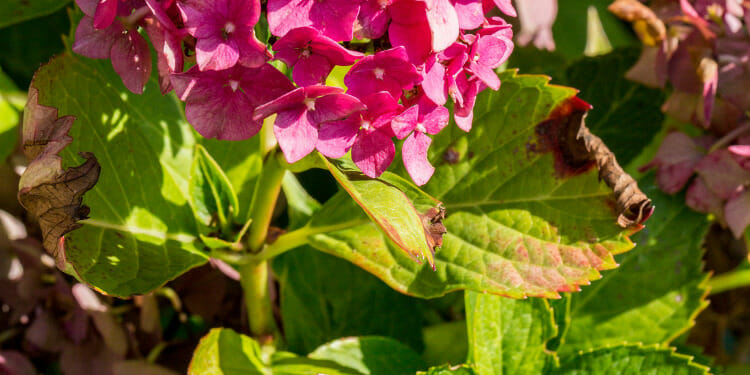
If your hydrangeas start budding and growing leaves before the last frost has passed, the leaves may exhibit some frost damage. This can usually be seen as a browning and curling of the edges of young leaves and the entire leaf may brown and die.
Even unseasonably cold weather can have this same effect on your hydrangea leaves. Once the damage is done, there’s not much that you can do except to cut off the damaged foliage ensuring that you cut each stem back to a pair of emerging buds.
You’ll also find that at the end of the growing season, as the weather starts to cool down, your hydrangea leaves will start to discolor and become brown or even yellow. This is perfectly normal and nothing to worry about.
In fact, hydrangeas do benefit from a couple of freezes in winter. This is the perfect time to give your plants a trim in readiness for the new spring growth. Always make sure that you cut each stem just above a pair of emerging buds so that you don’t end up with sections of stems that will die back.
4. Yellowing Leaf With Dark Green Veins
Anytime you see hydrangea leaves that are starting to look quite yellow but their veins are still dark green, you can be fairly sure that your plant has a nitrogen deficiency. You see, plants use nitrogen to help with photosynthesis which also uses the energy of the sun.
This process helps to produce the chlorophyll that all plants need to grow and thrive. Chlorophyll is also responsible for producing the green color of most plants.
The easy way to remedy this is to give your hydrangea a good feed. Using matured compost around the base of the plant and watering it in well is ideal for this. This is because hydrangeas prefer a slightly acid soil and the compost helps to create this.
You could also use composted animal manure or bone meal to add some nitrogen to the soil. Additionally, a well-balanced commercial fertilizer will also help to improve the color of your hydrangea leaves.
5. Holes In Leaves
If you notice some holes in your hydrangea leaves, they’ve probably been feasted on by slugs and snails. There are also a few different beetles that like to feed on hydrangea leaves. However, a few eaten leaves will not damage the health of your plant.
If you think the culprits are snails and slugs, it’s best to remove them by hand. Alternatively, you can set up some slug traps to catch the offenders at night when they’re most active. If the problem persist, you can spray your plants with a mixture of water and dish soap.
6. Leaves With Brown Edges And Curling
If the leaves of your hydrangea are turning brown on the edges and curling, it’s likely a case of underwatering. Hydrangeas do like to be kept relatively moist during their growing season.
Another problem could be that your hydrangeas are getting to much sun. These plants are much happier in a semi-shaded spot where they can get some protection from the scorching midday or afternoon sun.
If you think your hydrangeas may be suffering from too much sunlight, you can give them a little protection by placing some taller plants near them to offer shade in the afternoon. Alternatively, you could consider moving your plant into a shadier spot in the garden but wait until the cooler months to do this as the plant will be dormant.
Another cause of leaves browning and curling is an overuse of fertilizer. Too much chemical fertilizer in the soil can result in a build-up of salts which can be harmful to your plants. This is commonly referred to as fertilizer burn.
If you feel that your hydrangeas may be suffering from fertilizer burn, give the soil a really good soaking to wash the excess salts away. Then, refrain from fertilizing your plants for a month or so until they’ve completely recovered.
You might also like to switch to a more natural fertilizer like compost tea or worm tea as this will eliminate the possibility of salt build-up in the soil.
7. Hydrangea Rust
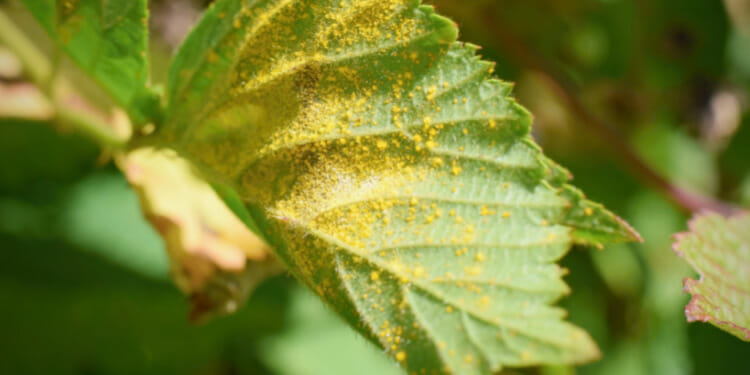
Hydrangea rust is fairly easy to diagnose because it only appears on the underside of the leaves. This is a fungal disease that exhibits as small orange spots on the undersides of the leaves. The spores of the fungus live in the soil and are spread to the plant when water splashes up from the soil onto the leaves.
If only a few of the leaves are affected, you should cut them off to stop the disease from spreading to other parts of the plant. As the affected leaves will usually be at the base of the plant, it shouldn’t be a problem to remove them.
For major fungal problems, you can treat your plant with a fungicide but in most cases this shouldn’t be necessary if you follow good cultural practices. These include removing any foliage and other debris from beneath the plant once you’ve trimmed them in the colder months.
To avoid many different types of fungal problems from infecting your hydrangeas, be sure to only water them at the base of the plant and avoid getting the leaves wet.

