Plumeria plants are famous for their gorgeous flowers and sweet fragrance, making them a favorite in gardens and homes.
Have you ever noticed the little pods that sometimes grow on them after the flowers bloom?
Those are seed pods, and lots of people wonder what they’re all about. Some are curious about what to do with them, while others might be a bit confused.
What do I do with plumeria seed pods? To utilize plumeria seed pods, wait until they ripen and split open on the plant, then harvest the seeds. Carefully remove the seeds, dry them for a week, and plant them in well-draining soil. Provide warmth, light, and moisture to encourage germination and grow new plumeria plants.
Understanding Plumeria Seed Pods
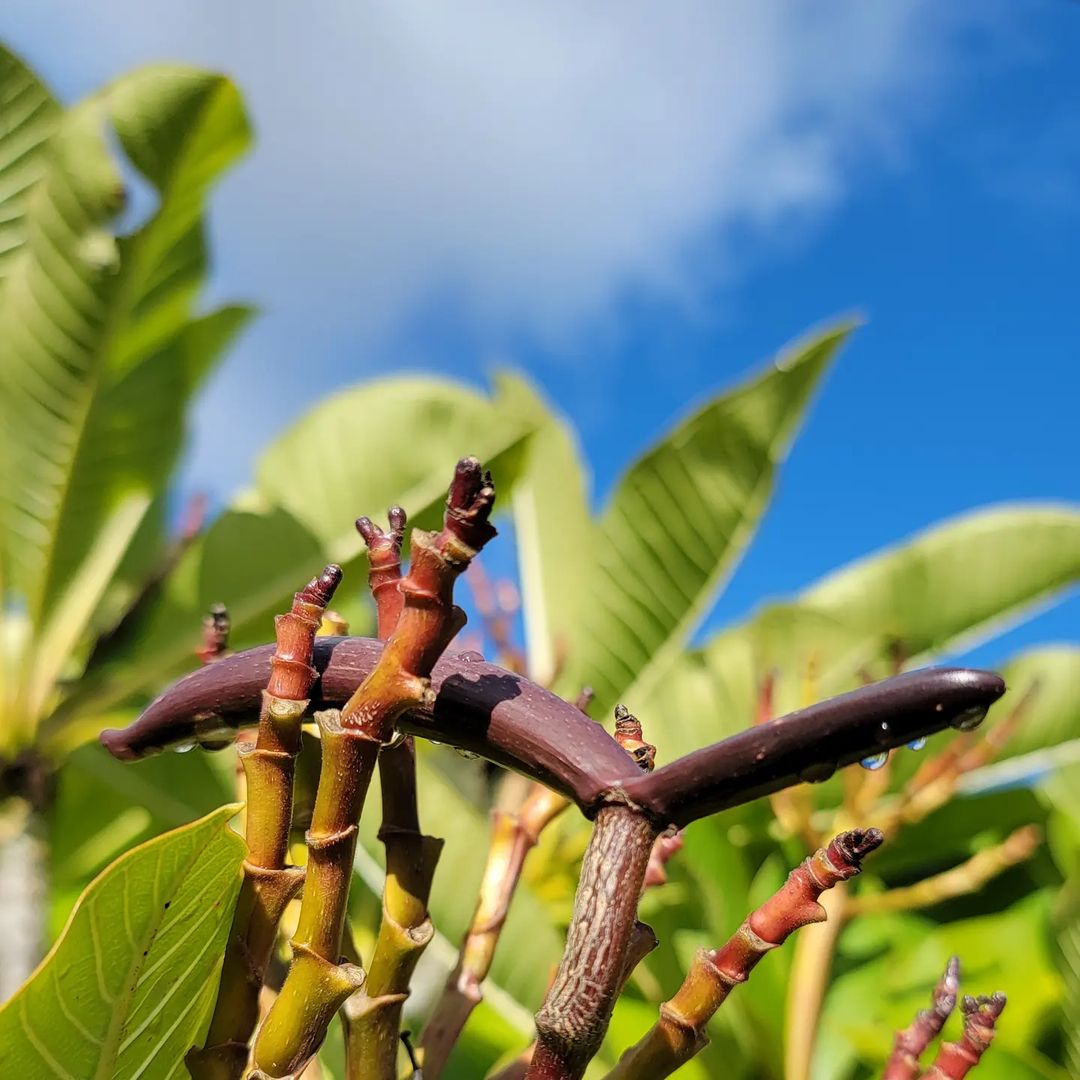
Plumeria seed pods have a distinct elongated shape, resembling slender green beans. They typically grow to about 6 to 8 inches in length. Their smooth, glossy exterior houses the future seeds. As the pods mature, they transition from a vibrant green to a brownish hue, indicating they’re ready for the next stage.
Lifecycle of Plumeria
Understanding the lifecycle of a plumeria is key to appreciating the role of seed pods. The journey begins when a seed germinates, sprouting into a young sapling. With proper care, the sapling matures into a bush or tree adorned with lush leaves. The true spectacle begins when it blooms, showcasing fragrant flowers in various hues.
The flowers don’t last forever; they eventually wilt, making way for the formation of seed pods. This usually occurs during the late summer or early fall, depending on the climate and conditions. The pods are the plumeria’s natural way of ensuring its legacy continues, each one potentially giving rise to numerous new plants.
The Maturation Process
The seed pods don’t mature overnight. They undergo a gradual process, taking several months to fully develop. Initially, they’re small and green, tightly clinging to the branches where the flowers once blossomed. As they mature, they expand, filling with seeds. This period is crucial as the seeds inside are developing and gaining the strength they need to eventually grow into new plants.
When Do Seed Pods Appear?
Seed pods typically appear after the plumeria has gone through a successful blooming period. Not every flower will produce a pod; it often depends on factors like the plant’s health, age, and environmental conditions. Generally, more mature and well-established plumerias are more likely to produce seed pods.
Importance in the Ecosystem
Plumeria seed pods aren’t just crucial for gardeners looking to propagate their plants; they play a significant role in the ecosystem. In the wild, these pods ensure the survival and spread of the plumeria species, contributing to biodiversity. The seeds, once dispersed, find new places to take root, creating more habitats and contributing to the health of the environment.
Harvesting Plumeria Seed Pods
As a gardening expert deeply invested in the propagation and care of plumeria, I’m excited to guide you through the nuanced process of harvesting plumeria seed pods. The correct timing and method of harvesting are crucial for the viability of the seeds and the health of your plant.
Identifying the Right Time for Harvest:
Understanding the optimal time to harvest seed pods significantly influences the success rate of germinating new plumeria plants. Here’s a detailed table to help you identify the right signs and timings:
| Stage | Description | Duration | Signs of Readiness |
|---|---|---|---|
| Early Maturation | Pods are green and growing in size. | 1-2 months post-pollination | Pods are elongated but still distinctly green. |
| Mid Maturation | Pods are fully grown in size and beginning to change color. | 3-5 months post-pollination | Pods turn from green to a yellowish or brownish hue. |
| Full Maturation | Pods are ready to be harvested. | 5-8 months post-pollination | Pods turn dark brown and may start to crack open. |
Step-by-Step Guide to Harvesting:
- Observation: Regularly monitor the pods as they mature. Look for the darkening of the pod’s shell, a sign they’re ready for harvest. Wait until the pods are brown and slightly cracked if possible, as this indicates the seeds inside are mature.
- Preparation: Before harvesting, gather your tools. You’ll need clean, sharp scissors or pruners, gloves to protect your hands, and a container or bag to hold the pods.
- Safety First: Ensure you’re safely positioned to reach the pods without harming yourself or the plant. If the pods are high up, use a stable ladder or long-handled pruners.
- Cutting the Pod: Gently hold the pod with one hand and cut through the stem with your other hand. Be careful not to damage nearby branches or flowers. Make a clean cut close to the branch to prevent leaving stubs that could invite disease.
- Handling: Once removed, handle the pod gently to avoid shaking out the seeds if it’s already cracked. Place it carefully in your container.
- Post-Harvest Care: After removing the pods, inspect the plant for any signs of stress or damage. Ensure it’s well-watered and healthy to recover from the loss of the pods.
- Drying the Pods: If the pods aren’t fully cracked open, place them in a warm, dry, and well-ventilated area. This will encourage them to split naturally, making seed extraction easier.
- Storing for Later: If you’re not ready to plant the seeds immediately, store them in a cool, dry place. Properly stored plumeria seeds can remain viable for several years.

Preparing Seeds for Planting
As an expert deeply passionate about the propagation of plumeria, I understand that the journey from seed pod to flourishing plant is both an art and a science.
Extracting Seeds from the Pods:
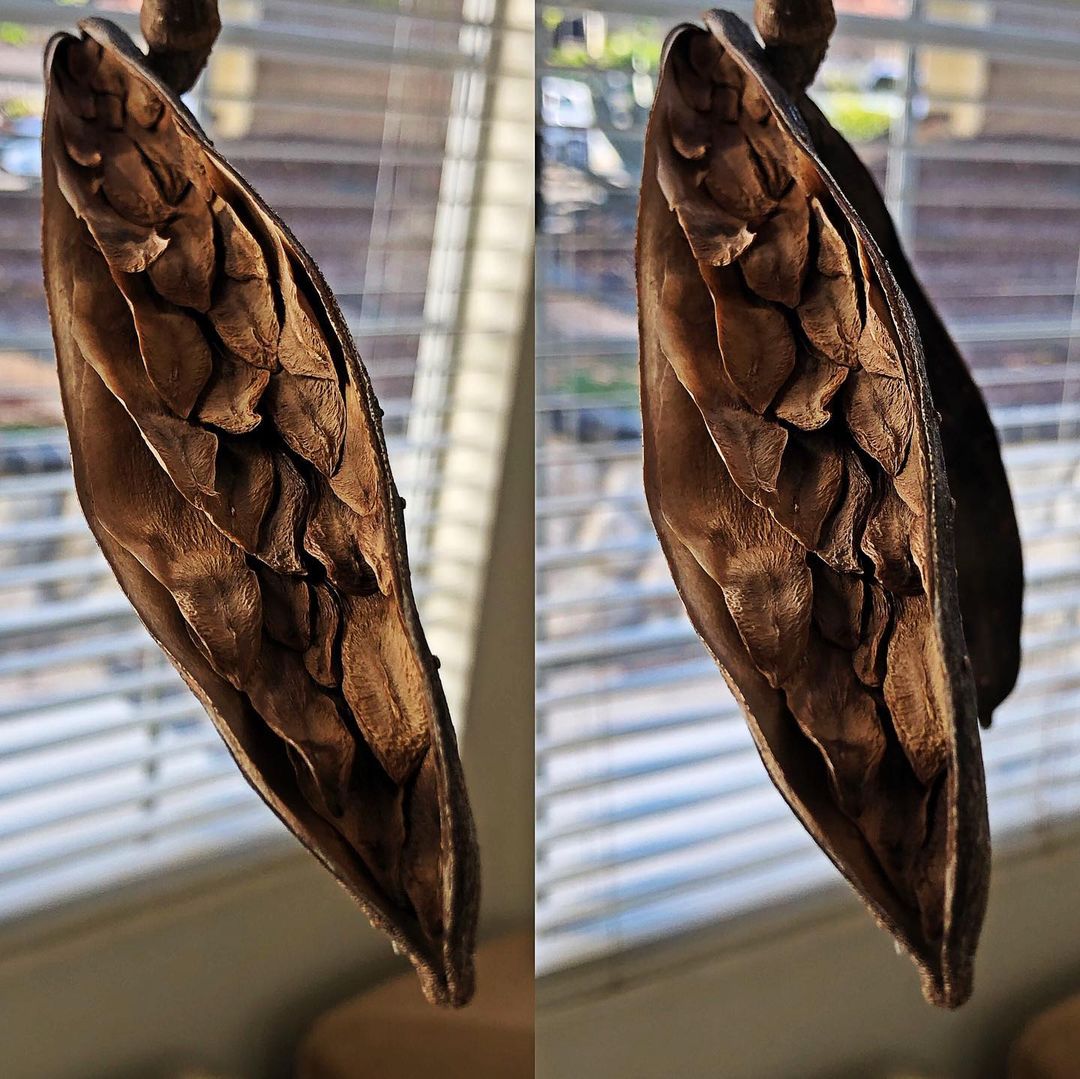
- Pod Inspection: Once your harvested pods have dried and split open, it’s time to extract the seeds. Inspect the pods to ensure they’re fully dry; the outer shell should be brittle and the seeds inside should rattle slightly when shaken.
- Creating a Clean Workspace: Lay out a clean, dry surface or tray. This will help you collect the seeds and minimize waste. Ensure your hands and tools are clean to prevent any potential fungal or bacterial transmission.
- Opening the Pod: If the pod hasn’t split completely, use a pair of sanitized scissors or a knife to gently cut it open along the seam. Be cautious and deliberate to avoid damaging the seeds.
- Extracting the Seeds: Gently remove the seeds from the pod. Plumeria seeds are typically attached to a thin wing-like structure that aids in their natural dispersion. Carefully detach the seeds from these wings if they haven’t already separated.
- Inspecting the Seeds: Examine each seed. Healthy seeds are usually plump and have a uniform color. Discard any seeds that are discolored, shriveled, or show signs of mold or damage.
Drying the Seeds:
- Initial Drying: Even though the seeds may seem dry, giving them additional drying time ensures they’re free from internal moisture, which could cause rot. Spread the seeds out on a dry paper towel or cloth in a warm, well-ventilated area out of direct sunlight.
- Duration: Let the seeds dry for approximately 5-7 days, checking them daily to ensure they’re not showing signs of mold or decay.
- Final Inspection: After the drying period, inspect the seeds again. Healthy seeds should feel hard and dry to the touch.
Storing the Seeds Properly:
- Choosing a Container: Store the seeds in a paper envelope or a breathable cloth bag. Avoid plastic bags or containers as they can trap moisture, leading to mold growth.
- Labeling: Clearly label the container with the date and type of plumeria. This is especially important if you’re collecting multiple varieties.
- Cool, Dry Location: Store the seeds in a cool, dry place away from direct sunlight. An indoor cupboard or drawer can be ideal. Avoid areas like basements or attics where temperature and humidity can fluctuate.
- Longevity: Properly stored plumeria seeds can remain viable for several years, though fresher seeds generally have a higher germination rate.
The effort put into correctly extracting, drying, and storing plumeria seeds significantly impacts their potential for successful germination and growth. Moisture is the enemy of stored seeds, leading to mold or premature germination.
Conversely, seeds that are too dry or stored in conditions that are too harsh can lose their viability. As a dedicated gardener, taking the time to prepare your plumeria seeds with care ensures the best start for the next generation of your beloved plants.
Planting the Seeds
- Seed Selection: Begin with healthy, viable seeds that have been properly dried and stored. Select seeds that are plump and uniform in color as they have the best chance of germination.
- Soaking the Seeds: Soak the seeds in lukewarm water for about 8-12 hours before planting. This helps to soften the seed coat and encourages germination.
Soil Preparation:
- Soil Type: Plumerias prefer well-draining soil. Use a mix specifically designed for succulents or make your own by combining perlite, sand, and peat moss with regular potting soil to increase drainage.
- Container Selection: Choose a container with adequate drainage holes to prevent waterlogging. This could be a small pot or tray, depending on how many seeds you’re planting.
- Filling the Container: Fill your container with the soil mix, leaving about an inch of space from the top. Gently tamp down the soil to remove air pockets, but don’t compact it too much as this can hinder root growth.
Planting the Seeds:
- Depth: Plumeria seeds should be planted shallowly. Press the seed gently into the soil with the wing end up and slightly exposed. The seed should be covered lightly with no more than 1/4 inch of soil.
- Spacing: If planting multiple seeds in one container, space them at least 2 inches apart to give each seedling enough room to grow without competition.
- Labeling: If you’re planting different varieties, label each container accordingly. This helps in monitoring and caring for them as they grow.
Environmental Conditions:
- Water Needs: After planting, water the soil gently but thoroughly. Ensure the soil is moist but not waterlogged. Use a spray bottle to mist the soil lightly if it begins to dry out.
- Sunlight: Plumeria seeds need plenty of light to germinate. Place the container in a warm, bright location but out of direct sunlight which can be too intense for the tender seedlings.
- Temperature: The ideal germination temperature for plumeria seeds is between 75°F and 85°F (24°C – 29°C). Consider using a heat mat under the container to maintain a consistent temperature if you’re in a cooler environment.
- Humidity: Covering the container with clear plastic wrap or a dome can help maintain humidity, which is beneficial for germination. Just be sure to remove the cover for a few hours each day to allow for air circulation and prevent mold growth.
Post-Germination Care:
- First Signs of Growth: You’ll typically see sprouts within a week or two. Once the seedlings appear, remove any humidity coverings.
- Watering Seedlings: Continue to keep the soil moist but not waterlogged. Overwatering can lead to fungal diseases and root rot.
- Thinning: If more than one seedling sprouts in close proximity, consider thinning them out. Choose the strongest seedling and gently remove the others.
- Fertilizing: Once the seedlings have a few true leaves, you can start a light fertilization regime with a balanced, water-soluble fertilizer diluted to half strength.
Why Grow Plumeria from Seed Pods?
One of the most exciting aspects of growing plumerias from seeds is the potential for diversity. Each seed is a genetic wildcard, potentially giving rise to plumerias with a variety of colors, scents, and forms.
This is a stark contrast to cloning methods like cuttings, where the offspring is an exact genetic replica of the parent. Imagine the thrill of being the first to witness a unique flower pattern or color that’s come from your very own garden!
For those with a patient and creative spirit, nurturing seeds provides the opportunity to develop new, hybrid varieties of plumerias, contributing something truly unique to the world of horticulture.
While seeds offer the excitement of variety and a personal connection, it’s worth comparing them with other propagation methods.
Cuttings, for instance, are quicker and guarantee the propagation of desired traits, but they lack the potential for variation that seeds provide. Grafting combines traits from two different plumerias, such as root hardiness and flower beauty, but it requires skill and doesn’t offer the same ‘from seed’ experience.
Tissue culture is a more advanced, scientific method that can produce large numbers quickly but is generally not accessible to the home gardener and lacks the personal touch of growing from seeds.